
This year I was asked to create something a little different and no, not from gingerbread or cake this time. 😀 No baking required!
I was asked if I would make a string quartet from rubbish people throw out. Using recycling is a great way to get creative and helps our planet. In this day and age, it is so important to recycle as much as we can and using someones rubbish to create beautiful things is even better. Charlecote's Christmas this year is based around recycling as much as they could to dress the house and I'm looking forward to seeing it all later this week.
To be honest, it took me a couple of weeks to work out in my head how I would do this before saying yes. Art, creativity is what I do but I've never made anything like this before, a recycled art installation as part of Charlecote Park's Christmas house display. I decided I was up for the challenge and said yes!
I thought some people might be interested in how I made the string quartet and as there is no better way than in a blog, here it is!
I loaded my car at Charlecote with old cardboard signs no longer needed, boxes leftover from deliveries, cardboard tubes from acid free tissue and Tyvek they use to protect items within the house and empty toilet rolls then headed home to start creating. I knew how I wanted it to look...... in my head anyway. The challenege was to create it for real.

If you've been to Charlecote lately this sign might be familiar, it used to hang in the drawing room to explain the time scale of the heating project. This card was used to create the outside of the cello.

Old boxes from deliveries to Charlecote and empty tubes, some of the recycle I collected from Charlecote.

I wanted sharp edges and clear lines and knew cutting with a knife or scissors would bend the card in the wrong places which I didn't want so I asked Surefyre Laser Design if they could laser some of the sections out for me to get the edges perfect. I have to say a BIG thanks to them, they cut everything I asked for and exactly as I asked for it which enabled everything to come together so much easier and saved soooo much time. This project was very time consuming and house consuming but without them donating their time to this project, it would have taken so much longer and not gone as smoothly as it did.
Violin and Viola from old boxes. These gave me a good start to work from and were exactly what I wanted.

.jpg)
The house team's thick cardboard tubes were perfect to make the instruments as sturdy as I could. I cut them to size then stuck them down with PVA glue leaving just enough room for the neck to be attached. It was then left to dry before going onto the next stage. Waiting for glue to dry properly takes time and I needed it to dry well, most of the time it would be left overnight.

The cello with larger sections of the tubes.


I filled the gaps with toilet rolls to stop anything moving then added glue to the top of the taller tubes.

Placed the top panel on top.

With a little help from some handy weights and left over night to dry. 😀

Not being able to wait, I tried a few colour choices, I loved this colour below while painting it.... but the following day it was far too dark and just wrong. It was repainted again and again until I settled on a reddish-brown colour which dried better and a little more the colour of many string instruments.
.jpg)
Even though it's not the final colour, this shows how they were put together.


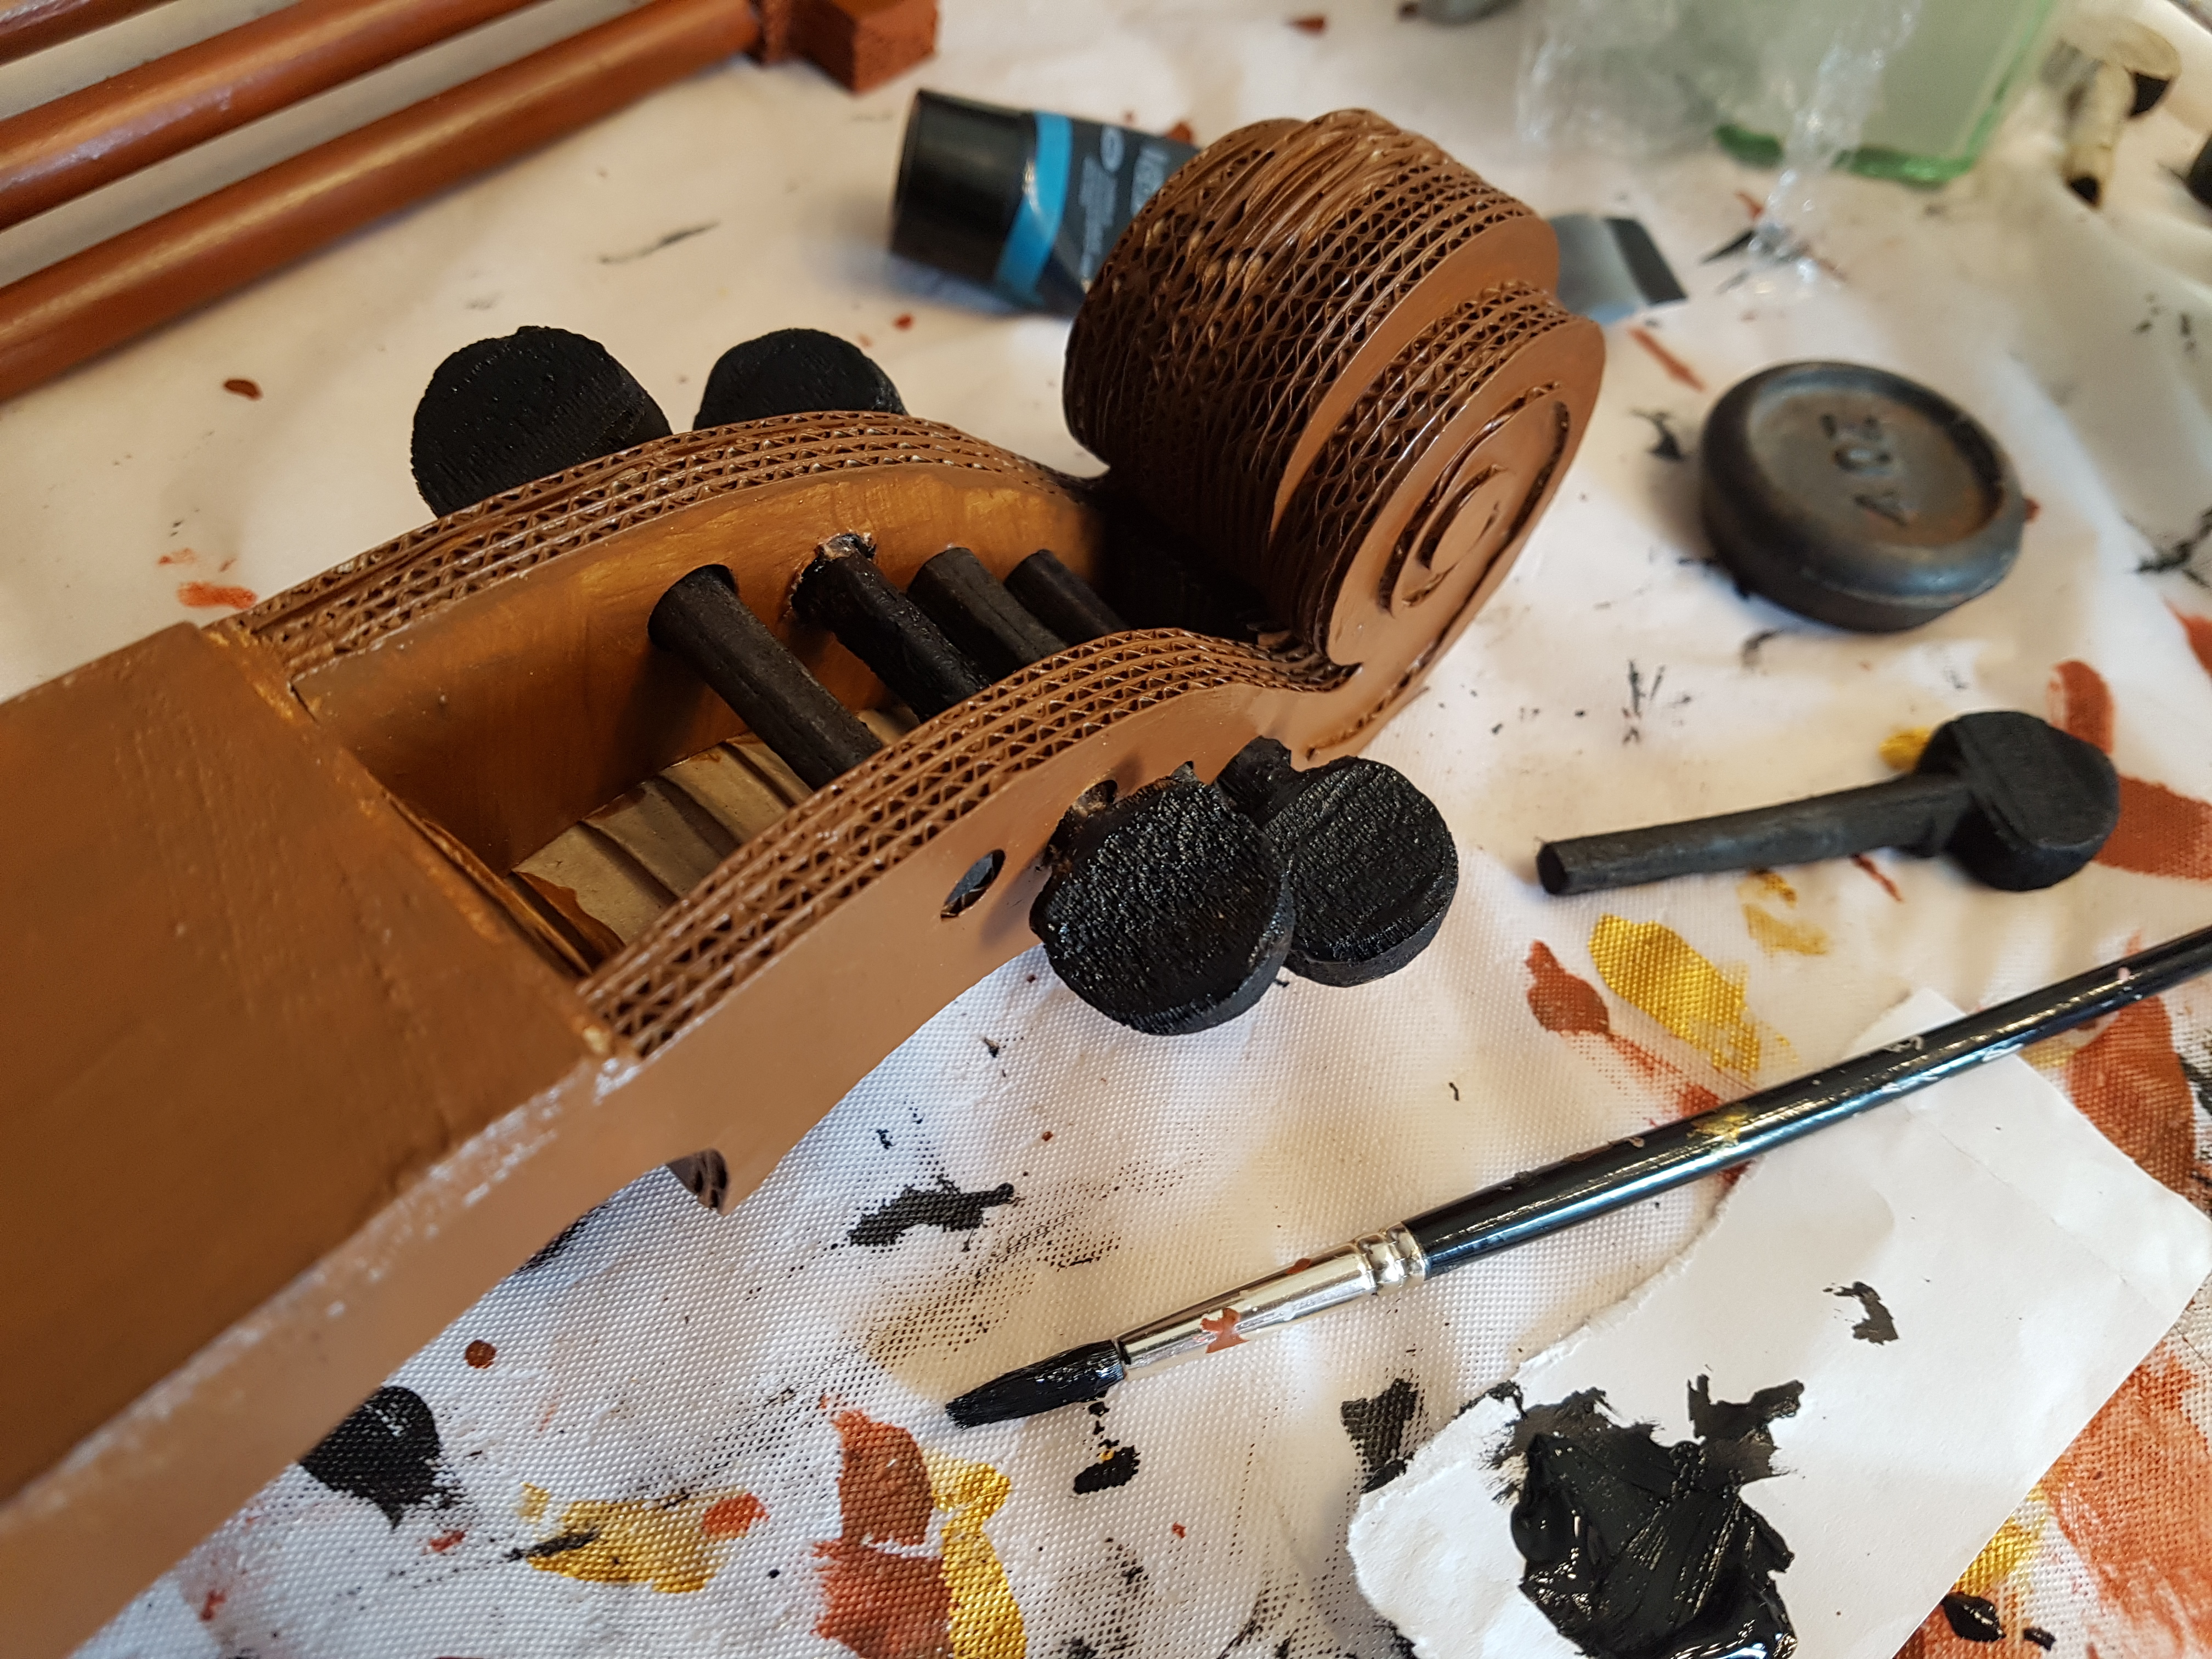
From the scrap pieces of card, I managed to cut couple of pieces of card to fit on the top and bottom of the necks. I used one peg in each instrument to help keep it still while I made the necks.


Reinforcing the necks with small strips of card to make sure the glue set well and everything stayed where it should!


The next day the tops went on and cut swirls were added to the side at the top of the neck to give the illusion of wood.

To finish the top of the neck, slightly larger round pieces of card were stuck in the middle to keep the outside parts where they were and to make it look more like a piece of wood. I liked it as it was so decided not to fill the gaps and leave it showing the layers of card. It makes a lovely detail on the instruments, one I really like.


The cello neck was put together exactly the same was but due to it's size, I needed a little help from some of my herb and spice jars for support while each section dried.

It fitted nicely into the gap I had left for this.

I filled the gaps with strips of card to make sure the neck wouldn't move, gluing each section as I went.

Top went on.

Support in place while everything is glued down. Then onto the re-enforcements.


Again, layers of card were added to the top of the neck to get the design I wanted.
.jpg)
Next was to fill in any gaps in the sides of the instruments around the cardboard tubes I'd used for support earlier with scrap pieces of card cut into strips. This was to allow (hopefully anyway as I was making this up as I went along) the card which would run around the sides, to lay as flat and smooth as possible, being corrugated card of course, it's a little bumpy.

This was a great way of using up odd bits of card and added some much needed weight. Every strip was glued to the next to enforce the sides. Time consuming but the results were worth it!

Putting the sides on the violin and violas


Getting there!

The next day a few more layers of paint went on to the violas and violin to get a good even colour and then they were left to dry.

During adding the layers of paint carefully.......of course, I managed to drop a viola and break the neck.....😂

It took me a while to think how I was going to fix this but in the end, it was quite simple. With a little help from four kebab sticks and yet more glue, it was left over night to set....

A little filler and sanding the next day and it was as good as new!

After painting the smaller instruments, I didn't like the gaps caused by the bumps in the card used around the sides so I put a little wall filler in them to smooth them out, then sanded them the next day and repainted theses sections.

Soooo much better!
.jpg)
Now you might wonder why I have only one violin and two violas, there is a reason for this which will be explained at the end.

I used thin corrugated card to cover the back of the top of the neck then painted them to fit in with the rest of the neck.


As the cello side was last one to be done, I was able to fill and sand the sides before painting.

A little filler goes a long way.


Thankfully, I have many herb and spice jars for support! 😊

Neck painted, each part needed at least tree layers of paint and had to be left to dry before the next section was done, especially with the cello as it was so big!

The attachments to the instruments were also cut out by laser thankfully as there is no way I would get that detail with a knife or scissors.
.jpg)
Each bit I had cut from thin card then stuck together and painted black to stand out. Gluing these sections together even though I didnt cut them all out, took time, they all had to be lined up exactly to work. The cello fingerboard was cut by hand as it was large and I had already made a template for it so finished it myself. These will go on last as I have to work out what support I will give them being card as unlike wood, they will start to bend after time if I don't!

Creating the bows:

I tried really hard to come up with a way to make these bows. I tried rolled card but it just bent, so after a little research and for the first time in this project (excluding the paint and glue) I went out and bought two parts! I felt like I betrayed my work as I wanted to make it 100% from Charlecote's recycle but alas, I didnt have the time to whittle some old branches down until they were the right size so, a DIY shop it was! I bought four dowels and a roll of ivory ribbon and asked Surefyre Laser Design if they could cut layers of thin card which could be stuck together to make the ends.They have been stars through this project. They even cut the pieces slightly different sized so that when I got them all glued together, it would have a slight curve and it stuck better to the dowel.
.jpg)
.jpg)
First I painted the rods the same colour but a shade darker than the quartet to match.
.jpg)
Then stuck the tips and frogs (bow ends) to the ends of each side of the dowel, clamped them down and left them to dry.
.jpg)
I did a little reseach and although many of the ends of the bows are silver and black, a few old special bows do have gold on them so gold was what I chose, I like to be a little different anyway. 😀
The next day, ready for the next step,
.jpg)
For the next section I used off cuts of garden string then painted them black and finished with a little more gold paint,

Luckily Surefyre laser design are very close so I was able to go through some of their throw away bits. From this lovely lantern....
.JPG)
I managed to get these...

With a little paint...

They were perfect to stick on the bows.

I left these at this point to dry properly as I wanted to pop a protective layer onto the paint but this has to be done when completely dry.
Pegs:
The pegs were cut out by laser again but with layers of paint on the necks of the quartet, I had to whittle them down a little to fit.

A little black paint and you would never know.😁

.jpg)
Bridges:
These were made with two pieces of card stuck together, the edges filled, sanded then painted.

The full set.
Everything at this stage was completed just waiting to be dressed.


To attach the bridges, a small hole was made the length of the feet to be able to push them through the top of the instruments and glue them down for a little more support.


Being made from card, I knew the fingerboard and tail piece would need a little help to stay in place so I added a little support underneath them using the pieces which would go there to work out were the support needed to go.

Glued in place and left to dry, then painted to match the base to help them blend in.

While that dried, I went back to the bows. Yet more glue.


I have to say, the bows are one of my favourite parts of this project. I'm really pleased with them.

I think one of the most annoying processes is waiting for things to dry, I'm sure many people will agree!
I have some old weights from an old scale that have been a godsend through this project, they are just the right weight to hold bits down while they dry without doing any damage.

Unfortunately, I only have one set of weights so other things found in the kitchen were used on the more sturdy parts of the instruments. 😁 Not the first time or the last time I will do this!

The next day, strings time.
The strings were actually old Christmas wrapping string leftover from a few years back. I threaded them through the tailpiece, double knotted the end then dabbed a little glue on them to keep them in place.
.jpg)
A little glue on the top of the tail piece to hold them down and a handy weight until dried.

The top of the neck was a bit of a challenege, the old Christmas string I was using didn't want to wind around the pegs properly so a dab of glue and a little paint fixed that.

.jpg)
.jpg)

Well......you use what you have. 😀

The Cello:
I doubled the string I had for this to make them look thicker and stuck them to the fingerboard as I was worried they would seperate if I didn't.


TADA....Finished!!!


It's been an amazing learning experience working with recycle and I'm so pleased how everything has turned out. I hope it's enjoyed with all the other work that has been put into Charlecote this Christmas. Blog on the rest of Charlecote dressed for Christmas coming in a few days.


String Quartet:
As promised, the story behind this string quartet. This Christmas, Charlecote will be frozen in time, frozen by the wicked Frost Queen and everything in the house is as it was at the time it happened. Just before the Frost Queen cast her spell, a string quartet was playing a piece of music by Franz Hoffmeister an Austrian composer in the 18th century.

Franz Anton Hoffmeister who was born in 1754 in a region of Austria which is now part of Germany. He had a successful music publishing firm in Austria and published many famous pieces by Haydn (known as the father of the String Quartet), Mozart, Beethoven, Pleyel, Albrechtberger, Vanhal and Paul Wrantitzky. It must have been amazing to move around in those circles at that time. Franz was also one of Mozart's closest friends.
Along with publishing music, he loved nothing more than composing his own pieces. Composing was where his heart lay and many of his pieces were written with a quartet of 2 viola's, 1 violin and 1 cello. Franz loved the sound of the viola and also used them along with a flute and cello arrangement.
He is a composer who is often forgotten amongst the giant composers of his time but shouldn't be. This beautiful piece of music was being played at Charlecote before everything froze.
A MASSIVE THANKS has to go to 'Surefyre Laser Design' who helped so much with this project and donated their time to it. Also a BIG THANKS for their patience and put up with all my last minute demands. 😅 Much appreciated.
Arrived safe at Charlecote.


Thanks for reading my blog, hope you enjoyed it or at least found it interesting.
Copyright Jana Eastwood